This camper has been a labor of love and I tried my very best to keep a record of all expenses throughout this renovation project. I have received many requests to know just how much our vintage camper revival cost and the time has come for me to lay it all out!
First things first, what was the purchase price of our camper and what did we get?
In my opinion, old campers are gold and when you are lucky enough to come across them in decent shape, snag them!! I am always on the hunt for old campers and this time I was lucky enough to get in contact with the sweetest old man (who actually is my cousins grandpa) that wanted to part ways with his family camper. Not to mention it was just down the street from me!!
He did not want me to give him any money for it but we did give his grand daughter $300 for her upcoming Disneyland trip, which is all he would take! The camper is a 1968 Prowler that is 16ft long with a bathroom, dinette that turns into bunks and a pull out couch bed.
Although it looked as if this camper was in great shape, we had to literally sawzall off the old hitch just to get it onto our truck to hobble home. The cushions were crumbling as I was pulling them out and we found water damage on almost all of the window frames. It had no black tank and different size leaf springs, so we had our work cut out!
With this being said, this was our fourth renovation and we felt very confident in our 2-3 month timeline (which we accomplished!)
Let’s break it down.
Demo:
We started with the demo! Luckily this step requires mostly muscle and not much money coming from your pocket (that is assuming you have access to some basic tools like a hammer, pliers, impact drivers and pry-bars. One cost you may incur is a dump run fee to trash all of the items you take out, which may run you about $50.
Demo: Free
Framing:
Until you get into demo you never truly know what you may have to repair. In our case, all of the windows on the right side of the trailer had water damage to the window framing along with a small section in the front corner and in the back storage area. The cost to fix these areas are as follows:
wood to frame: $82
Insulation: $20
Melamine boards: $65
Shiplap and Board & Batten wall treatments: $123
Framing Total: $290
Shiplap
Board & Batten
Exterior:
Next we tackled the exterior since we had to remove all of the windows to do the needed framing repairs. We resealed all of the windows and added new butyl along with new roofing screws. All of the seams of the trailer were redone the same way and the roof seams were resealed with lap sealant. Check out the paint prep here!
The awning and back storage area I chose to add which completely upgraded the look! It only took 3 high quality 2×6 cedar planks in the back and 5 cedar fence boards to create these. Click here to see this!
Cedar and fence boards: $167
We didn’t know that a the current leaf springs on the trailer were different sizes, so when we removed the tires we had that extra suprise. Remaining exterior costs were as follows:
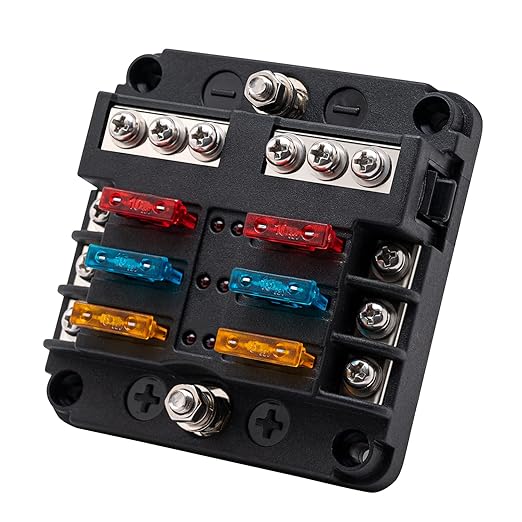
Although we kept the basic wiring throughout the camper and just updated the light fixtures, we also decided to give this girl a little more power by adding solar and a small battery bank. We added one 100 amp hour Lithium battery along with two 100 watt Solar Panel from Renogy. We also added a DC fuse box, updated the shore power outlet and changed all of the exterior lights out. Cost for these items are below:
In this section I will cover all of the work we did on the inside including paint, flooring, counters, tile, bathroom walls, cushions and decorations.
Interior Paint required 1 gallon of primer and 1.5 gallons of paint color. I was able to get a sample quart for the cabinet color and a sample quart for the blue accent. I had left over epoxy appliance paint for the shower pan.
With that being said, I do want to thank the wonderful brands that I was so lucky to partner with for this renovation! I have done multiple renovations in the past and I will say some of the finishes in here are more than I normally would spend, but I do hope that you know I reached out to all of these companies because they offer top notch quality products. Without all of YOUR support none of this would be possible! Be sure to check them out! With that being said a large portion of this project was sponsored and my total cost was $3,517.09!
Thanks for posting this! Almost $12,000 is definitely more than I thought you’d spent, but it is really not that bad when you think about the fact that it’s high-quality materials and customized to be exactly how you’d like it.
2960 and that was with two full propane tanks and water tank filled and our stuff packed. curb weight for this trailer is around 2800 from what i could find online
You did the best job ever. Really fantastic!!! I’ve shared your journey on this 1968 Prowler, a ton. I’m looking for a sweet place to stay at my sons house. Currently staying in the over the cab camper and this would really make life so much easier as I wouldn’t have to climb up on to bed over the camper.
If you ever ever decide to sell or know of one like this, please please contact me?
I came across this post on perfect timing. My husband and I are remodeling a 1966 Terry traveler and your blog has helped us find things we were stumped on and gave us encouragement to go past our comfort zones.
Where would you recommend someone looking to renovate a trailer like this or bigger? It’s a pipe dream of mine to do the same but a dream nonetheless. Absolutely stunning!
Do you happen to have a video on how you put the water tank in?
My husband and I are following your renovations with our reno on our 1966 Terry Travel and have some questions.
Hey Love your work! we are getting ready to start my parents 1978 23s Prowler… picking it up in two weeks. Had to get new tires, barrings, and breaks first. Hauling it 600 miles to our house. Fingers crossed and lots of Hail Marys. We know the roof needs to be completely removed and a new rubber one put on so that will be our first thing to do. I love how you logged everything very handy for us. Yes. I follow you on all social. I am thinking of blogging/social this reno. Any tips or suggestions?
Writing to say Wynona is almost complete! Thanks to Nelly for help! It’s been a long haul, tons of work, and hoping one run with her before it gets too cold! Lwtravels1978 on instagram to see the progress!
Just picked up this exact trailer. Quick question? I saw you put the window ac unit where the furnace used to be. Did you have to do anything special to install? Also is it doing a good job of cooling the trailer down in that position? Thanks looking to do the same if it works for you.


35 Comments
Chad
This is amazing
Renee
Thanks for posting this! Almost $12,000 is definitely more than I thought you’d spent, but it is really not that bad when you think about the fact that it’s high-quality materials and customized to be exactly how you’d like it.
nailgunnelly
Yes and you cant go buy a trailer for that much either!
Dianne
Lwtravels1978 on insta. I am almost done. It’s taken a year and I’m right at 10k. There’s more to do than meets the eye.
Jo millet
Will you sell this trailer? It is stunning!
nailgunnelly
We plan to keep it for now!
Susan
This belongs in some kind of magazine somewhere. It’s beautiful!
nailgunnelly
So sweet of you to say! Thanks
Reid Campbell
Maybe I missed it, what was the completed weight? How did it compare to the original specs?
nailgunnelly
2960 and that was with two full propane tanks and water tank filled and our stuff packed. curb weight for this trailer is around 2800 from what i could find online
Shannon
Any chance you recall where you got the rug/runner in the kitchen? (It all looks fantastic!!)
nailgunnelly
https://s.markable.ai/trjJR
nailgunnelly
I will have to add that to this list!
Dave
Thank you for posting all this it was a great time spent watching everything
nailgunnelly
So happy you enjoyed it! Thanks for following along!
Cindy
You did the best job ever. Really fantastic!!! I’ve shared your journey on this 1968 Prowler, a ton. I’m looking for a sweet place to stay at my sons house. Currently staying in the over the cab camper and this would really make life so much easier as I wouldn’t have to climb up on to bed over the camper.
If you ever ever decide to sell or know of one like this, please please contact me?
nailgunnelly
Will do!
Kameron
I am in love with this!! And if you ever sell I would love to know 😀 lol
nailgunnelly
Absolutely, thanks!
Jamie
I came across this post on perfect timing. My husband and I are remodeling a 1966 Terry traveler and your blog has helped us find things we were stumped on and gave us encouragement to go past our comfort zones.
nailgunnelly
So awesome! Glad to hear!
Beth Humes
Love it !! Your so talented !!
Vanessa
Where would you recommend someone looking to renovate a trailer like this or bigger? It’s a pipe dream of mine to do the same but a dream nonetheless. Absolutely stunning!
nailgunnelly
I usually find all of mine on facebook marketplace or word of mouth!
Jamie Flerchinger
Do you happen to have a video on how you put the water tank in?
My husband and I are following your renovations with our reno on our 1966 Terry Travel and have some questions.
nailgunnelly
All the videos I have are saved to highlights on my Instagram page!
Dianne
Hey Love your work! we are getting ready to start my parents 1978 23s Prowler… picking it up in two weeks. Had to get new tires, barrings, and breaks first. Hauling it 600 miles to our house. Fingers crossed and lots of Hail Marys. We know the roof needs to be completely removed and a new rubber one put on so that will be our first thing to do. I love how you logged everything very handy for us. Yes. I follow you on all social. I am thinking of blogging/social this reno. Any tips or suggestions?
Dianne
Writing to say Wynona is almost complete! Thanks to Nelly for help! It’s been a long haul, tons of work, and hoping one run with her before it gets too cold! Lwtravels1978 on instagram to see the progress!
Pingback:
Pingback:
Ernest Ybarra
Just picked up this exact trailer. Quick question? I saw you put the window ac unit where the furnace used to be. Did you have to do anything special to install? Also is it doing a good job of cooling the trailer down in that position? Thanks looking to do the same if it works for you.
nailgunnelly
It honestly didn’t work out great, barely cooled it off! I would go with a tilt out trash can instead!
Pingback:
Pingback:
Pingback: